Paint
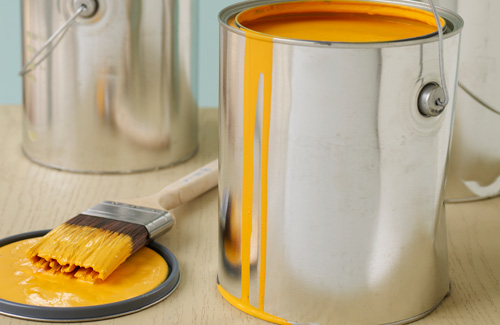
Your house is your lifetime asset. And it's a matter of time when you take a notice that your house needs renovation - not because it's getting old, but because you feel the need of vibrant colors in your house.

Repainting your house is a tricky business. Some rely on painting companies to do the job for you. Hiring the house painting service may also cost you. But if you are planning to paint it yourself, you might want to consider the basics; and consider the time and effort you will put on painting your house.

There are many types of paint available today, some giving different surface finishes, others are designed for a particular application. Choosing the correct paint type may appear to be confusing at first, but once you have projected which theme you would like to paint your house and sorted out which job and what finishes you want, the choice is rather easy.

There are two bases of paint for your house: solvent-based (oil or alkyd) and water-based (latex). Oil-based paints dry slow usually taking up to 24 hours. The best clean up for an oil-based paint is turpentine or paint thinner. Latex paints' advantage is that it dries relatively fast, but it is not desirable in hot weather or direct sunshine. The best clean up for latex paints requires just soap and water. So if you are painting the inside of your house, it is recommended to use water-based paints, while solvent-based paints are suggested for painting the exterior of your house.

There are different types of paints that is either water-based or solvent-based that produces different finishes that is measured by its sheen factor. "Sheen" is a term used to describe the degree of light reflection the paint has. Lesser sheen for an interior or exterior paint means it has lesser stain resistance.

A Gloss paint is easy to clean and resists scuffs better. This is ideal for rooms that are constantly used. Most gloss paints are best recommended to use on woodworks, baseboards, kitchen and bathroom walls, doorjambs, and window casings. The downside of using gloss paints, however, is the noticeable imperfections in the wall surface.

A High-gloss paint is highly reflective and works well for highlighting details, such as trim and decorative molding. They are also the best choice for doors and cabinet - or any area that sees a high volume of abuse.

Semi-gloss paints are very similar to gloss plaints except it has lesser sheen. Semi-gloss is also suitable for rooms with high humidity (best used for children's room) and can be used for trim works and casings. These paints ensure maximum durability.
Eggshell paints provide a smooth and low-sheen finish. Paints that are smooth and low-sheen that is ideal for your living rooms, dining rooms, bedrooms, and dens. It is washable and ideal for bedrooms, hallways, home offices and family rooms.

Satin paints offer a good combination of easy-clean and moderate sheen. These paints go a step above eggshell in scrubbing ability. They perform and look great in just about any room.

Flat paints (matte paints) are non-reflective and always a good choice for large walls and ceilings. Flat paints hides imperfections on wall surfaces and spatters well during application. Flat paints are the best choice for vinyl and aluminum siding that is scratched or dented because it hides imperfections and spatters less when applied. These paints are ideal for low-traffic areas such as formal dining rooms and master bedrooms.

Special paints have been innovated from different consumer insights and brilliant paint technology that allows specific paints for specific needs.

Primer paints may be oil- or water-based and are used to seal unpainted surfaces to prevent covering coats of paint soaking in. The appropriate type of primer should be used for the surface being painted - wood, metal, plaster or tiles. There are some 'all purpose primers' available which are designed for two or more of these surfaces.

Anti-condensation paints are used for rooms with humid conditions such as kitchen and bathrooms. This paint is usually formulated to prevent condensation and often includes fungicide.

Fire-retardant paints do not resist fires completely but its fire-resistance formulation prevents it from fire in spreading fast.
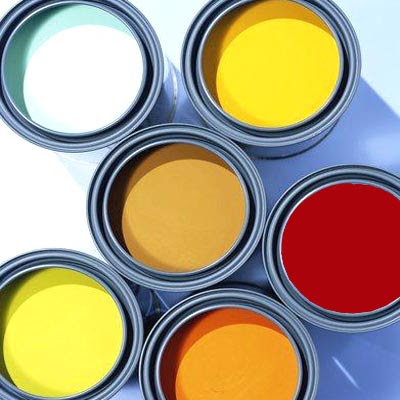
It is also important that before painting your room, you use a primer. A primer will help paint adhere to the surface by providing a uniform appearance. It is a must to use a primer if you are painting over new wood, bare wood, drywall, or repainting over existing bright or dark colors.

But before doing this, you have to know the condition of the surface you wanted to paint. Regardless of whether the base coat is oil or latex, you must dull glossy paint by sanding or de-glossing it with a chemical de-glossing product. If you don't dull glossy paint, the second coat will streak and not stick to the base coat when drying.

When it comes to picking paint, selection begins with choosing between oil-based and water-based paints. For hundreds of years, people have been using oil-based paints for their impermeability and toughness.

Unlike water, oil does not dry by evaporation. It dries through a process of oxidation that converts the oil into a polymer chain. This means that the layer formed will be resilient and long lasting, and will withstand the degenerative effects of water and air longer than water-based paints. There are, however, several disadvantages to oil-based paints. First of all, oil paints take longer to dry than water-based paints, have a strong odor that lingers long after the paint has been applied, and contain volatile organic compounds (VOCs).

The paint pigment in oil paint is suspended in the solvent. VOCs are found in this solvent and are released as the paint is drying or being cured. VOCs are harmful to occupant health and the environment. Indoor air pollution has now been identified as being three times more harmful than pollution outdoors. This is mainly due to the release of VOCs by oil-based paints and other off-gassing interior VOC-containing finishes and furnishings. Government regulations regarding VOCs are becoming stricter; this may be one reason why oil-based paints are decreasing in popularity.

As opposed to oil-based paints, water-based paints (sometimes referred to as "latex paints" or "acrylic paints") do not use solvents; the carrier for the pigment is primarily water. Latex paints have come a long way from when they were considered an inferior replacement for oil-based paints, and they're now on the verge of dominating the market. The advantages of latex paints are many. The drying time is significantly shorter than oil-based paint, which requires up to 48 hours to dry, leaving the room unusable during this time. Latex paints also have a minimal odor and release significantly fewer VOCs during the drying process.

Because fewer or no VOCs are released, latex paint is significantly less harmful to building occupants. In addition, it requires less care to apply than oil-based paint and solvent, which are both highly flammable. Latex paint can also be thinned with water, unlike oil-based paint, which requires a special thinner.

Beyond oil- and water-based categorization, paints can also be classified based on their function (e.g. primers, sealers, binders, finishing paints, etc.). They can also be classified according to the type of pigment used, like zinc, lead, and titanium (each has slightly different properties). But, by far, the most important classification of paint is the one that provides information about the type of finish.

With the traditional application of paint, the finish reveals how the paint reflects light once it's dry. An exception is when special painting techniques (e.g. faux painting) are used, since these lend a completely different finish. Generally speaking, in commercial buildings, the finish depends solely on the type of paint used.

Matte. A matte finish reflects light poorly. It's a rough finish that's generally considered to be warm and comfortable. Matte finishes are not slippery; therefore, they don't wash very well. For this reason, it's not recommended to use a matte-finish paint on walls in rooms that have frequent visitors (e.g. a reception area or a conference room). The best places to use this finish are in executive offices or boardrooms: places where only a few people use the room, and the chances of dirtying the walls are low. Matte finish is great for hiding imperfections in the walls because highly reflective paints draw attention to imperfections by creating a crack in the uniform light reflection. Matte paints inherently avoid this problem.
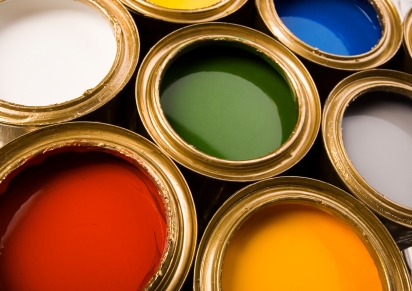
Flat enamel. If you want to have the look of a matte finish in a bathroom or a café, consider paint with a flat-enamel finish. This paint holds the same properties as the matte finish, with one exception: It's more washable. Unfortunately, paints with enamel finishes contain extremely strong chemicals and can exude an odor for several days.

Eggshell. The next paint on the curve of reflective properties-the eggshell finish-has a decent amount of sheen. If you can imagine looking at an eggshell in the light and seeing how the light bounces off of it, you'll have a good idea about what this finish will look like. As expected, the eggshell finish is easier to clean because of its slight gloss.

Satin. A satin finish is glossier than an eggshell finish, and it's even easier to keep clean. Due to their dirt resistance and ease of cleaning, the usual choices of location for satin finishes are halls and stairways. The finish gives a velvety shine to the surface and will not hide imperfections.

Semi-gloss. Semi-gloss paints have a high durability and a good amount of sheen. They are best used on surfaces like doors and trim. Due to their high water resistance and ease of cleaning, they are also an excellent choice for painting the walls of kitchens and bathrooms.

Gloss. At the high end of the reflective gradient are glossy paints, which are rarely chosen for interior walls due to their extreme shine-any imperfections will glaringly stand out. It's best to use them when painting floors and trim; the finish is extremely durable.
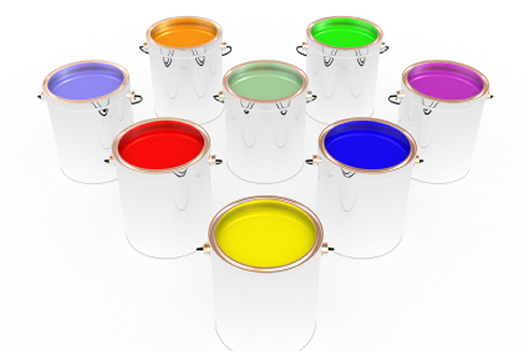
Painting a room is more than just taking out a brush and applying the paint. It's a well-known fact that a good paint job is 80-percent preparation. This holds true whether you're painting office walls or an entire building. Try painting a ceramic tile by directly applying the paint; you'll find that the paint just doesn't stay because the ceramic tiles are smooth and glossy, and don't give the paint any grip. The role of the top layer of paint is primarily to provide color. It's not made to have great adhesion or protection value. To get paint to stick to any surface, you need to use a primer. A primer is a layer of paint that's applied before the topcoat. It's designed to stick to almost anything. Once this is laid down and dried, the topcoat of paint is applied; this time, it'll hold.

Having a good primer is, however, only part of the process. All surfaces need to be prepared to receive paint. The type of preparation depends on the surface. Wood needs to be planned and sandpapered. Depending on whether it's hardwood or softwood, you may need to get rid of knots that will exude resin and spoil the paint job.
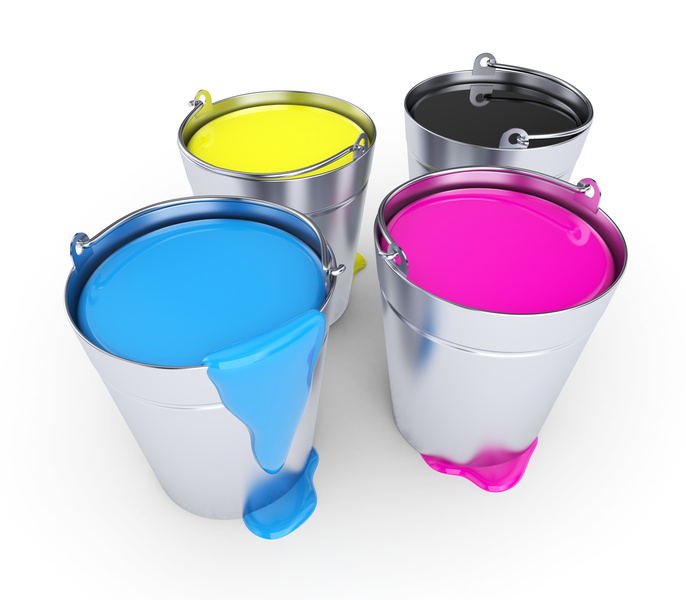
If the paint is being applied to metal, the most important step is removing any grease. This can be done with a liquid de-glosser. Rust must also be removed. Specific rust cleaners containing oxalic acid are made for this purpose. If pipes that contain hot water are being painted, then the paint needs to have special properties that enable it to withstand heat.

It's almost always necessary to paint a surface with more than one coat, and there are several reasons for this. The main reason is to get the full color that you want. With just a single coat of paint, you might be able to see a glimpse of the original color underneath. Also, two coats are more durable. In addition, the second coat of paint allows you to cover up what may have been missed during the first pass. In general, the second coat of paint can extend the life of the paint job by a factor of three. As a rule of thumb, two coats of paint are accepted to be enough for a surface.

As mentioned in the discussion of oil and latex paints above, the time the paint takes to dry depends on the drying process. If you're using latex paints, the drying process takes place by evaporation and is, therefore, much faster-maybe as quick as 1 hour. Oil-based paints, however, don't dry in the conventional way: They are cured, and this can take several days. Since it's necessary to wait for the first coat of paint to dry or cure before the second coat is applied, your paint job will either be hastened or delayed, depending on the type of paint being used.
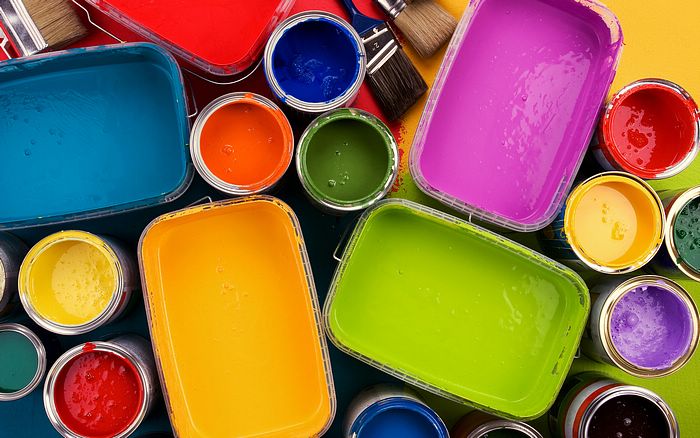
Various surfaces require different painting techniques. Additionally, some surfaces take well to certain paints. Painting drywall surfaces is fairly straightforward. Drywall (also known as gypsum board, wallboard, or plasterboard) is a panel of gypsum surrounded or lined with paper. Drywall surfaces take well to water-based paints, and any finish will look nice, apart from a glossy finish.

Painting block surfaces, such as masonry or stone, is problematic because the surface is often uneven. Several pores and cracks make it impossible for a primer to do its job properly and fill them in; therefore, block filler, a paint-like material that smoothes out uneven or porous surfaces, is necessary. It's also used on concrete blocks. While block filler isn't very durable, it's possible to use it as a finishing coat by itself. It's recommended, though, that a more durable finish, like eggshell or semi-gloss paint, is applied after the block filler.

For metal surfaces, consider using latex paints. Due to the latest advances in paint manufacturing, water-based paints have now become a viable alternative to oil-based paints, and are often preferred due to their environmental friendliness. (In the past, water-based paints promoted the formation of rust on the metal through oxidation.) To paint metal that has been previously coated with an oil-based paint, the metal must be properly prepared by being de-glossed and coated with a latex-bonding primer. Glossy finishes, like satin or full-gloss paints, are typically used for painting metal surfaces due to their ability to protect against water and mold. Another good option for metallic surfaces is an epoxy coating.

Painting interior walls is one of the easiest ways to add new life to a bland space and can be accomplished by even the most inexperienced person with advice in this article, written by a skilled professional. Once you implement this information and in effect build up a new confidence, you will be able to tackle more advanced painting projects around the house. Now let's get you on your way to creating more enjoyable spaces and possibly adding a little equity to your home in the process.

Preparation, the key to a successful paint job is to take the correct steps when preparing the job. Preparation for this article, has two parts, the first part is wall prep. The walls you are going to paint may have nail holes or imperfections that need to be filled before you paint. The proper way to fill them, if they are smaller is with water putty, by simply forcing a little bit of the putty in the hole and breaking it off flush with the surface. For larger depressions, use a drywall compound or spackle, which may require a second application to fully fill the indentation and make the repair/"patch" flush with the wall.

Once the drywall compound/spackle has had sufficient time to dry, you will need to lightly sand the surface of the repair to smooth out any ridges that may have been caused while "coating" the patch. Once you have the surface sanded smooth, take a wet sponge or cloth and, by lightly washing/rubbing, blend the outside edge of the drywall compound/spackle back into the wall. For a smaller repair, you can wash away the excess drywall compound, leaving only the compound/spackle only in the area where the indent was filled. For a larger hole, after filling, sanding and using a wet sponge to blend the outside edge of the compound back into the wall, it may be necessary to texture the area in order to give the smooth patch the appearance of the existing wall.

There are many different kinds of textures, a smooth wall -which is really a "non-texture," will only need to be sanded and the outside edges sponged before painting over it. Hand texture which is easily reproduced by applying drywall compound with a drywall knife and troweling the compound on the patched area to simulate the existing wall texture. A rolled on texture is applied by rolling on some thinned down drywall compound or dry mix that water is added to -the thickness of the compound or dry mix will determine the heaviness of the texture. Some variations of roll on textures have a rough sand granule appearance and both dry mix types can be purchased at most local hardware stores, large hardware depots or at local paint stores, where you will also be able to find spray cans of orange peel or knock down texture. Always make sure to shake the can for a couple of minutes, then test out the spray pattern on a piece of cardboard or scrap sheet of drywall before trying to simulate it on the wall. Orange peel is just sprayed on and left to dry, you will need to experiment so you can adjust the spray nozzle to simulate the texture as close as possible to the size/pattern of the existing wall.
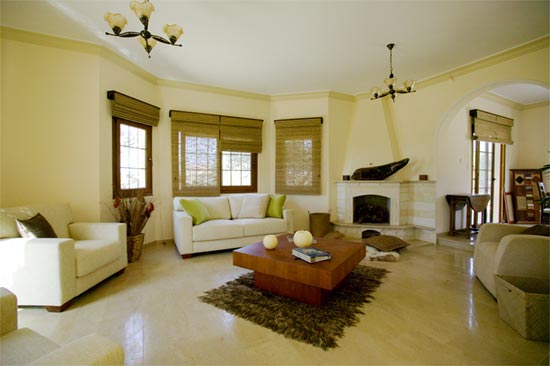
Knock down texture is basically a orange peel that is sprayed on and allowed to "set-up" for a minute or two then gently "knocked down" by running a 6" drywall knife over it, "knocking down" the surface of the texture. Although knock down is a flattened version of orange peel, I suggest you do not use a spray can of orange peel, the knock down comes in its own spray can and the results are much better, again experiment before spraying it on the wall. However, If ever you apply any of the textures to the wall and are not satisfied with the results, wash the texture off immediately before it dries, then allow the wall to dry and try it again. Once you have the texture applied to your liking and you have allowed it to dry, you may want to paint the patches a couple of time before painting the entire wall, especially for walls where the paint to be applied will have some sheen. Multiple coats on these areas will make them blend in, unnoticeable, with the rest of the wall. You will know if the patches need more coats of paint, because the patch/texture will have absorbed the paint causing the spot to look duller than the rest of the existing wall.

The second part of preparation is surface prep, it addresses covering the surfaces you do not want to get any paint on. A little plastic sheeting will go along way to keeping paint off of floors, window coverings, handrails, cabinets, counter tops, etc... And, if you are not confident with your ability to paint a straight line next to door casing, baseboards, cabinets or hardware protect these surfaces using masking tape. There are two basic types of masking tape white/yellow and blue. The white tape sticks to surfaces better but, can pull off finishes on cabinets or stained woodwork. Blue tape usually will not pull off finishes but, does not stick as well, this will probably be the tape to use for most applications. Always wipe down or dust the surface you will be masking to assure the best tape adhesion possible. If you use blue tape you may need to re-rub down the tape before painting next to it, only mask off areas with blue tape that you will be painting for a given day. With either tapes, do not assume the are a force field that paint will not penetrate, use them as a reference and dry brush the paint next to the edge of the tape and avoid soaking the edge of the tape with a lot of paint, this will cause the paint to "bleed" through giving you an undesired look. If you will need to apply multiple coats of paint, on the first coat, paint as close to the tape as you can, not really getting paint on the tape. With the second coat or a one coat application, you can use the tape more of like a paint barrier and get a little more paint on the tape if you immediately remove each section of tape after painting the section, this will keep the paint from sitting on the tape and "bleeding" behind it. Also, if you get a lot of paint on the tape it is not good to let the paint dry on the tape because some paints (especially the glossier paints) will peel if allowed to dried, with the tape when it is pulled off. White tape should not be left on for longer than a couple of days and I suggest not leaving it on more than a day in areas that receive long periods of direct sunlight. Blue tape can be left on for days, if it will stay on, there again it does not stick as well and may need rubbed down again immediately before painting up next to it.

Materials and their application, every paint manufacturers paint will vary. If you are freshening up old walls and painting back to the existing color, the product doesn't have to be high end or have good coverage. If you need to paint a dark color over light color or light color over dark, you may want to consider purchasing a top quality paint to avoid multiple coats. I suggest Valspar, Pittsburgh or Benjamin Moore top of the line wall paint. These brands work well for straight out of the bucket use and are application friendly. Sherwin Williams is not my first choice because the coverage is poor and you will have to apply multiple coats but, it does apply, fluently. If you find a product does not apply well, maybe it is to heavy and/or sagging on the wall, you may need to thin the paint with a little water, this will reduce the coverage but make the paint flow better and lay down nicer on the surface. I do recommend latex paints for all applications, these days a good high end latex is as good as oil paint and your tools clean up much easier, it will also be less harsh on the respiratory system. The only situation I recommend oil paint, is as a primer/stain blocker over stains that "bleed" through the paint. You can get a stain blocking oil primer in a convenient spray can and spot prime any trouble areas before painting and in the case you need to prime all of the wall due to smoke or water damage, I recommend getting it in gallons and rolling it on where the stains are present. Don't forget proper ventilation and/or a respirator when using the oil based primers!
Proper brush technique: When "cutting in" with a paint brush you should dip the brush in paint and tap the sides of the bucket on each side of the brush, leaving a good amount on the brush so you are able to minimize the times you will need to dip/load the brush. Next, take the brush and make a one foot to two foot line down the wall about an inch or two away from the trim or surface you are going to paint up next to, this is much like taking a knife full of butter and spreading it across an entire slice of bread. After, spreading the paint over the section, go back and even the paint out evenly across the section and cut up next to the trim with the brush. You want to paint up next to the trim or surfaced to be cut-in with the paint brush after you have released most of the paint on the wall, it is easier to cut in with the tips of the brush exposed and not loaded with a lot of paint.

Proper rolling technique: When rolling paint on the wall, get the roller skin evenly loaded with paint and make a V,N or M pattern on the wall, this is to spread the paint across the entire section you will be rolling, then roll back across the section and even out the paint. To properly "lay off" each section, make a final pass of the section applying light pressure to the roller frame arm end of the roller skin and bringing the nap mark (mark created on the pressure applied side of roller skin) across from the beginning of the section to the end of the section, and just repeat all the way down the wall.The V,N or M pattern, will be determine by how far the paint will spread, a V is for less spreading paint and M is for farther spreading paints. Do not "dry roll", which means trying to roll to much of a section at once with very little paint on the roller. Just as important, do not apply to much, if you find you are applying to much, increase the size of the section you are painting i.e. from a V pattern to an N or a N pattern to a M.

* TIP* -It can be easier to roll first and then you will know exactly what you have to go back and cut-in with the brush. If you will need to put a ladder on the wall, then cut-in first and roll after you use the ladder to prevent marking the finish painted wall with the ladder. If you are using darker paints colors with a lot of tint/colorant, It will look better if you cut-in first and roll up as close as possible to cover up as much of the brushed/cut-in mark.This will keep the shadowing affect that shows between the cut-in and roller, down to a minimal and thus less noticeable.

Step 3: Tools, there is a wide variety of brushes and rollers to choose from, it is critical to select quality tools and maintain them. We will discuss brushes first, I use and recommend only Purdy brand brushes, they will give you the best results in terms of coverage and make the project go much easier and quicker. A Purdy brush is a little more expensive but if kept clean promptly after each use and stored properly, it will last for years and many projects. Most any other brushes out there, especially the cheap ones, are made of far inferior hair and I liken them to using a hand (or whisk) broom to paint with. Using lower quality tools will only frustrate you and lead you to assume that you are incapable of painting. You are capable! and the proper tools, materials, and advise are all you need. If your painting project will be on going for a couple of days, you can wet the brush with paint, wrap the brush up in a plastic sandwich bag and tape the plastic bag to the handle above the metal ferrule. Sealing it up will keep it from drying out, storing it flat will maintain the shape and permit you to use it for a couple of days without cleaning it. Because, after a couple of days or if it has had extended use on a hot day, it will loose its shape and start to collect a lot of dried paint on the hair, you should clean it with warm water and a wire brush. Once you have ran some water through the brush hair, the wire brush will then be used to remove the dried paint from the hair. Always run the wire brush down the entire length of the hair and never across it, to prevent crimping and damaging the hair. After you get the brush clean, spin it between your two hands, shedding as much water as possible from it. Then, using the wire brush again, comb the hair, shape/style the hair with your hands and lay it flat to dry. Once dry, if you will not be using the paint brush again soon, protect it by storing it in the paper shuck/cover that it came in and it will be like new the next time you use it.

The correct roller to use depends on the texture of the wall. On smooth walls you will need a 1/2" nap and on textured surfaces it will be more like a 3/4" - 1" nap depending on how rough the texture is. I always recommend a lamb skin, it will lay the paint off the best and provide maximum coverage. A roller pole is also great for saving your back, shoulder and arms from repetitious bending over and extension. If you will be using the roller for a couple of days, the same rule applies as with the brush, seal it in plastic completely to preserve it for the next day. Do not leave the roller submersed in paint or water over night, this will cause premature failure, by releasing the skin from the hardboard backing it is attached to. If you will be rolling a rough texture, like a stucco, make sure to purchase a roller frame (arm) that is sturdy and will hold up to constant applied pressure.

*Final tip* -Always have the right height ladder for the job, stretching to reach a wall is dangerous and will fatigue the back, arms and shoulders. Select a ladder rated for the amount of weight you will be using on it. If you don't feel confident on a ladder it's probably not safe to be on it.

Now, armed with useful tips and practical information, you are ready to get your paint on and make those grand home improvement ideas, reality. Go put on some old clothes from the closet that you have been meaning to give to Goodwill, the looser the better to allow for maximum movement and reach. Make sure and have a couple of rags handy, these could be some old cut up t-shirts. Plan out the process, have all your tools and equipment gathered together, keep steady at the project (and on the ladder) and don't leave any open buckets in the way to be accidentally knocked over. Please visit dennardbloss.com and join our blog or offer feedback to this article or any other subject.


No comments:
Post a Comment